Saturday, May 24, 2014

Showcase : Luke Skywalker Red 5 X-Wing repaint

Arguably the most well known science fiction star fighter of all time, Red 5 was the personal fighter of Luke Skywalker during the battle of Yavin. He used it to destroy the Death Star and save the Rebellion.

The craft is represented here before trench run, with R2D2 still operational.


Notice the ball magnet in the stand to allow full rotation of the model:


If you're interested, 2 WIP shots of the model follow.

First the model after application of the base colors on black primer.
As on the B-Wing, I first airbrush white for the base color, then painted the markings in mephiston red. The yellow nose line was painted in Iyanden darksun and highlighted with Iyanden+white. The cockpit was painted in astronomican grey+black and the canopy received a simple coat of black.

To get closer to the banged up look of the fighter in the movies, I then painted small grey dots using a small piece of foam to get random patterns and give the weathered look.


After that followed the now classic black oil wash.


The wash was removed on the raised/flat areas using a qtip, then I highlighted the grey base with white and I finished the details.


Time to reload!
Ica

Wednesday, May 14, 2014

Battle report : Bomber swarm VS Vador Shuttle & 2 Bounty Hunters

Go big or Go home!


After reading the bomber thread on the fantasy flight games forums, I wanted to try the Tie bomber. I'm a fighter swarm man myself, so I tried to cram as many ships I could into 100pts.

Here's what I got : 5 gamma squadron with seismic charges, 100 pts. My reasoning was : more ships, more firepower, more ordnance at the impact point on the important turn. After that, higher PS means you can see where is your opponent before unleashing said ordnance.

Guess what: no plan survives first contact with the enemy!

Knowing I would be playing a 5 bomber list, my opponent decided to play :
2 Bounty Hunters, Gunner
Omicron Lambda, Darth Vador

I won the initiative and tried to spread the asteroids out. He deployed first and I deployed right across in a 2 deep formation:

We both slow played the first turn, with hostilities starting on turn 2. He focused with all 3 ships, while I target locked the middle Bounty Hunter.


I made a mistake here, I should have banked and concentrated on the shuttle, because as you can see position was ideal for him: the 2 bounties have room for a 1 straight next turn, and I won't be able to use my seismic charges. I locked instead of focusing because I knew I would be able to use the lock the following turn after K-Turning.

He did 3 damages to the top bomber : 2 crits (1 with vader), console fire and thrust control fire, while I removed 3 shields from the middle hunter, keeping 3 locks on him.

As planned I K-Turned behind him, which would have been great against almost any other ships, but was a disaster here. I managed to lower the middle hunter to 3 hull, while the he killed the damaged bomber (who had crashed into the lambda as he was stressed, he was unable to K-Turn) and did 2 additional damages to the top bomber (crit is another console fire!)

Here is the board after turn 3:

At this point, the situation was difficult for both sides.
We had the same number of hull+shield on both sides (30) at the beginning of the game, but due to the way Vador works, he actually lost 11 points to my 8. However, I was down one ship, and my firepower was thus 20% lower.

Disaster! I went too slow, letting the hunter increase the distance to range 2, meaning that I failed to destroy the top hunter, leaving him with 1 hull (choose focus as my actions, failed to roll any eyes).
The hunters on the other hand finished the damaged bomber, leaving the lambda free to crit the lead bomber, taking two damages for Vador : damaged cockpit (twice) and injured pilot .

The board after turn 4:

It was looking pretty grim for Gamma squadron!

He banked 3 the top hunter and hard turned 2 the other, the lambda banked one. On my side, the damaged bomber did 1 straight at PS0 to get an action, while the 2 others leap-frogged it, all three dropped charges on the lambda.
In a stroke of luck, the first bomber took the last hull from the top hunter. While the lambda did its thing, leaving itself and the damaged bomber with 1 hull.

The board after turn 5:

I K-turned the 2 bottom bombers to finish the lambda before it got to fire another force powered shot while the top bomber trailed the hunter.

The board after turn 6:

The rest of the game is less interesting, suffice to say I tried to preserve the damaged bomber from the hunter, failed, and lost another bomber to get the firespray down to one hull.

Here is the board on the last turn:

At some point we entered a turning duel, and I tried to match his radius, taking a 2 hard turn.
I had a 3 dices shot, with no action, to his 2 green dices and evade token for his last hull.

3 Blanks! We had to call the game as I had to leave : Victory for Vader, with 80pts destroyed to my 62 pts.

Even if I ultimatly lost, the bomber is definitely an interesting ship to play, much more resilient than my usual Tie-Fighter, and with lots of ordnance options. Now I want to try missiles and torps!

Time to reload,
Ica 

Sunday, May 11, 2014

X-Wing : Attack of the Sponge Asteroids

Do you feel that asteroids in X-Wing are too two dimensional?
Do you keep K-Turning X-Wings on asteroids?
Then this tutorial is for you:

Attack of the Sponge Asteroids!


I've been wanting to make 3D asteroids for a while now and I finally took the time to do it using Jokerounet tutorial on sw-xwing.com

The asteroids had to be playable in a tournament, thus the shapes had to be the official shapes, the rocks had to be removable to place models on top of the asteroids and finally either faces had to be usable.

Here's what you need:

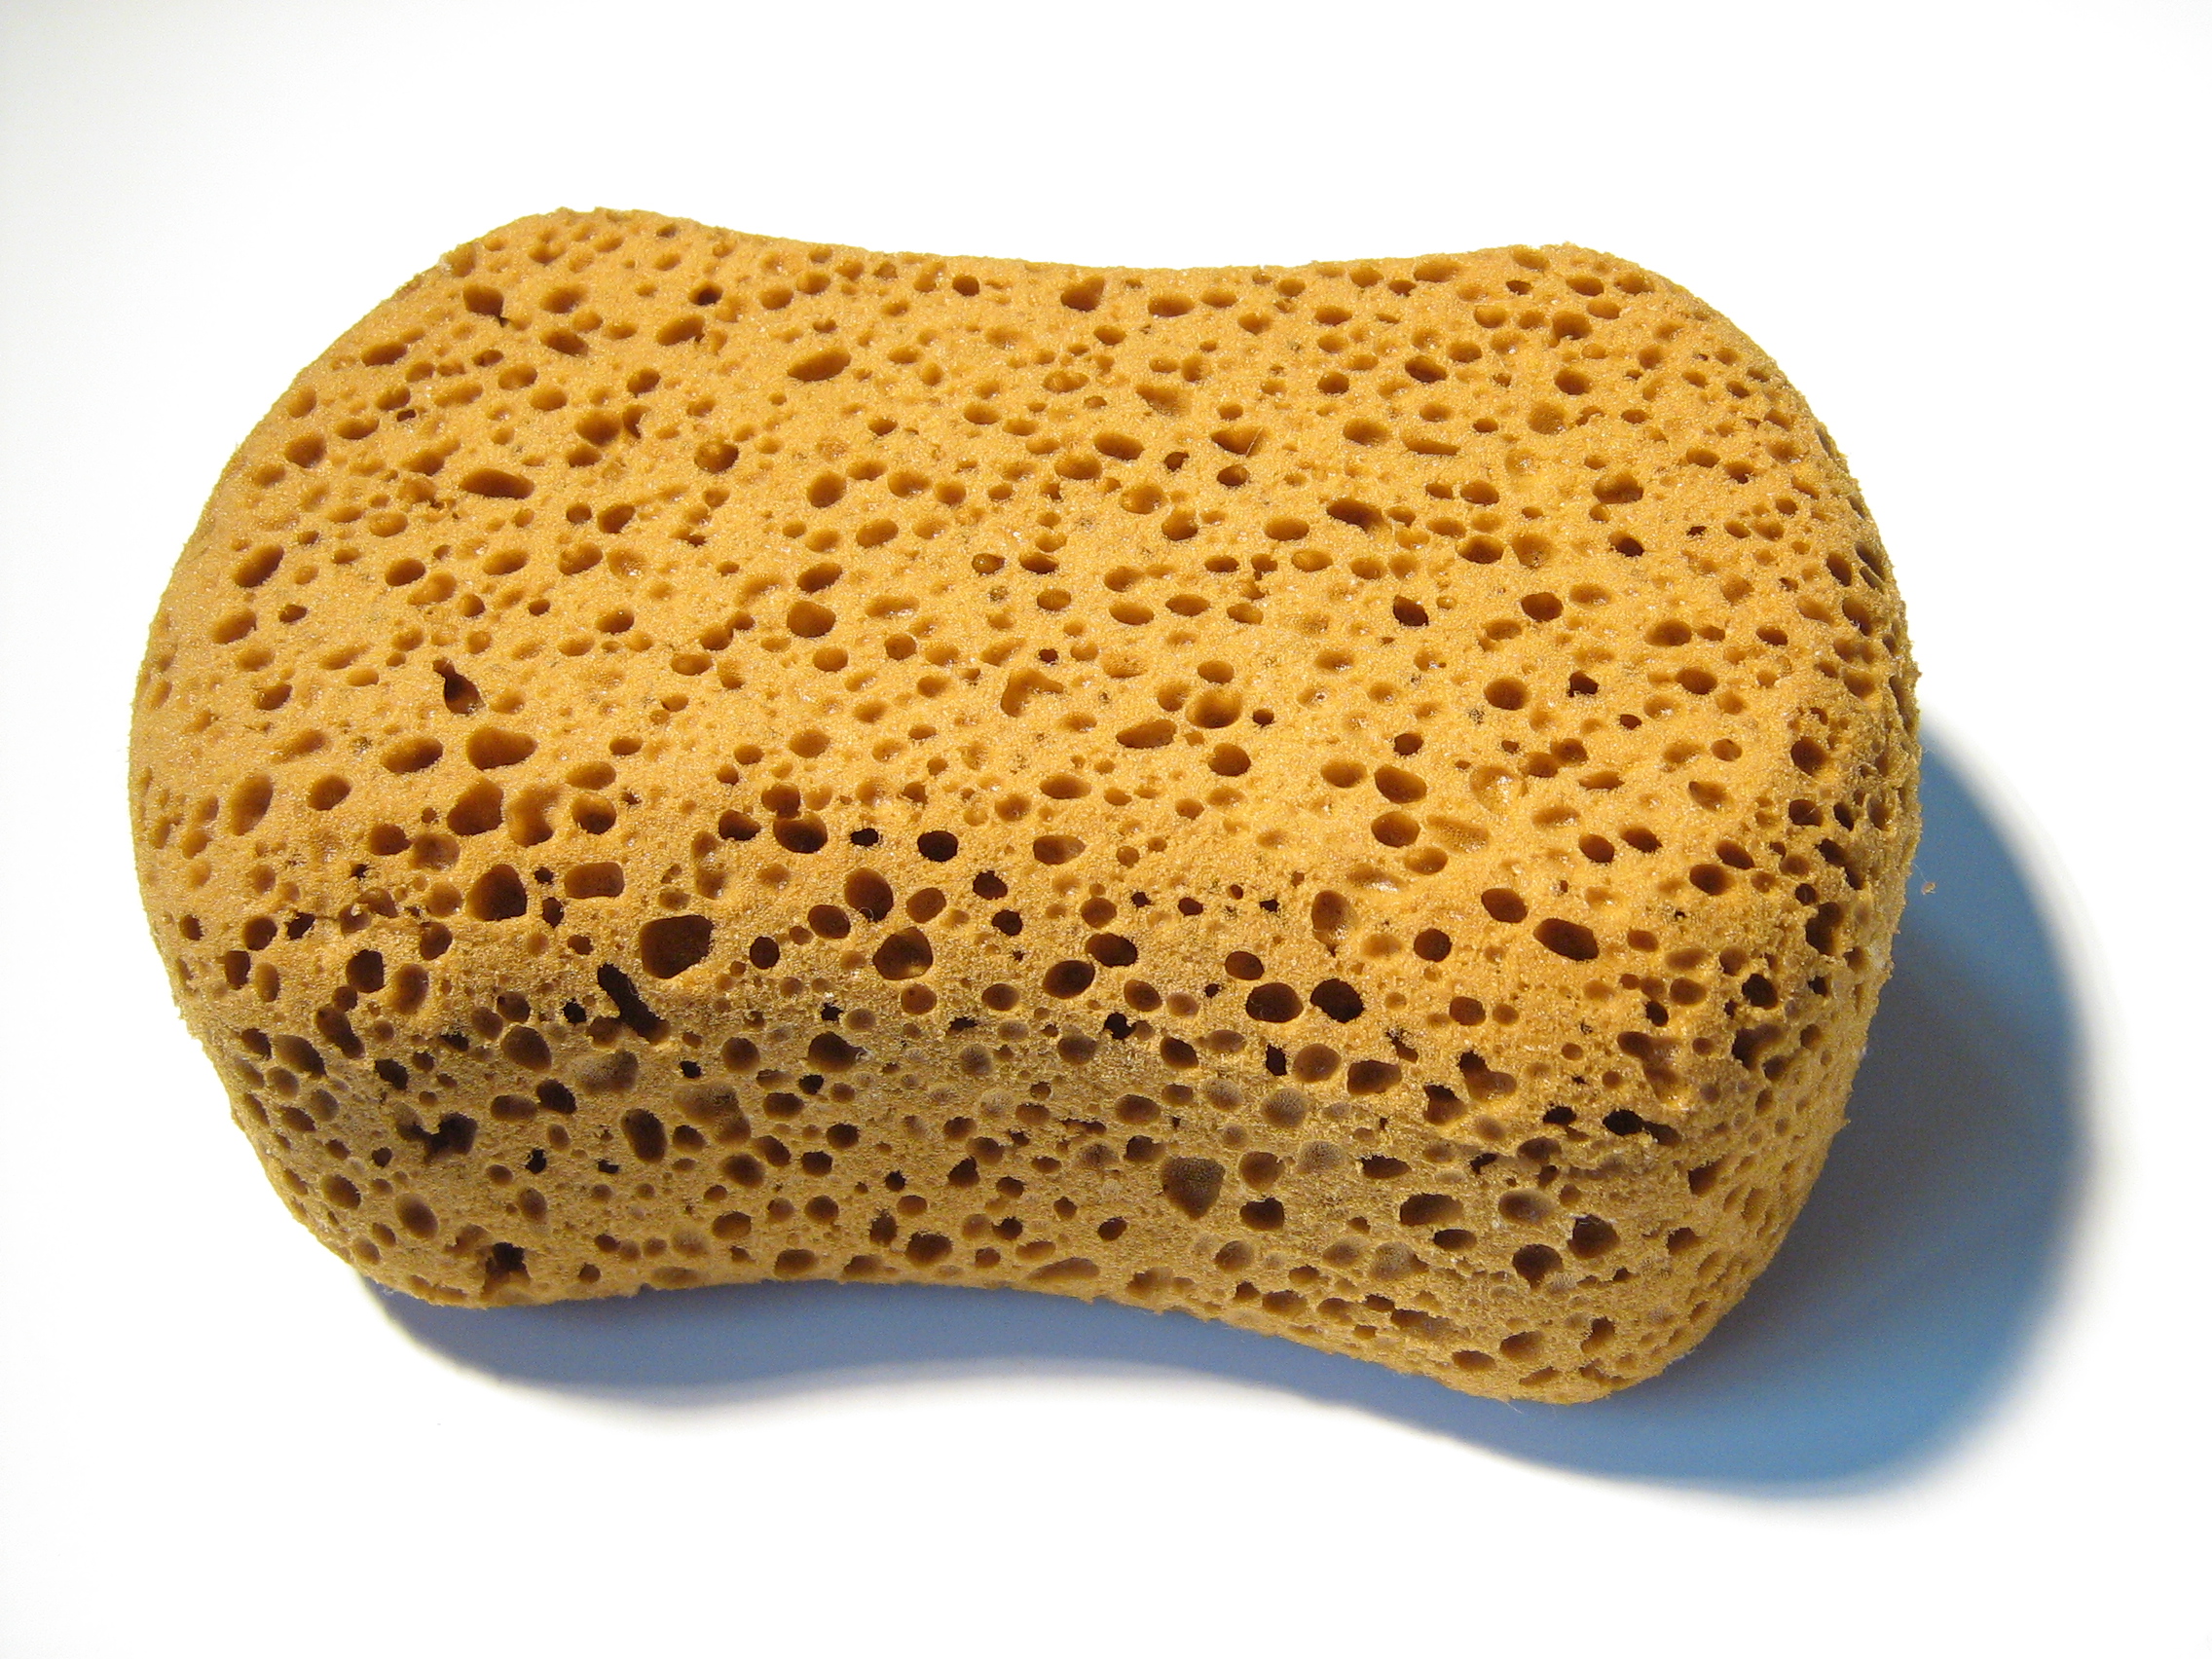
- One large or several smaller sponges:
- 6, 1 cent euro coins (or similar metallic pieces if you can find cheaper)
- 6, 5*2mm magnets
- the cardboard asteroids from the starter box
- 3mm rod (I used aluminium knitting needles)

First start by drilling a 5mm hole in the center of all cardboard asteroids and glue a magnet inside.
Then drill a 3mm hole in your coins and glue a length of rod on one side. I went with various lengths between 4 and 6 cm to increase the visual impact.


Next comes the fun part: take your sponge apart, tearing large chunks about 5cm on a side and glue those on top of the rods opposite of the coin. If your using small sponges you can bulk your asteroids as I did by gluing several chunks to a rod spaced by pins or more rods. After gluing coat everything with a generous sprayed undercoat:


I said coat everything! We're going to need that undercoat for the next step.


Take out the airbrush, load with thinned white and spray the asteroids randomly.


Now you can either stop here, with pretty nice asteroids on black bases, or, once more inspired by Rodent Master, you can go the extra mile.


To achieve the radar display look, paint in white a couple of concentric circles by rotating the the base around the magnet. Then paint the 8 intersecting lines. Go back with a black brush to correct your mistakes.

Using masking tape, mask part of the asteroid in order to draw a line between the center and the edge. Mask the center of the asteroid to get something like this:
Afterthought picture using a finished base to reproduce the masking pattern. 
Spray white paint starting at the mask and fading going counter-clockwise, so that the white is brighter close to the mask and fades to the black undercoat on the opposite side.

Finish by tinting the grey/white of the asteroids with your ink of choice.


Now I can finally play Alderaan as it should be played!

"Unidentified Firespray, this is Mauler of Black squadron, reduce speed for visual inspection"

Time to reload!
Ica


Wednesday, March 26, 2014

Tools of the game : X-Wing acrylic templates

More X-Wing goodness!

After seeing Rodent Mastermind acrylic templates on his blog:
http://www.afewmaneuvers.com/topic/1462-rodents-hobby-blog/

I just knew I had to get a set. His ideas never cease to amaze me (the inspiration for my B-Wing base come from his).

X-Wing acrylic templates, imperial green, after painting
The templates are sold by Cog'O'Two : http://www.cogotwo.com/war-gaming/gaming-ruler-set-orange-detail and only set me back 15.5 pounds with shipping to France.

Packaging was top notch in a nice padded envelope.
Each template is protected on the top with a layer of paper like material, while the bottom is protected by a layer of plastic film. I'm guessing the paper material is part of the industrial process used to etch the designs on top.

You can see the raw templates in Rodents blog.

I decided to paint the etched design to give them a little more contrast.

The idea is to leave the paper layer in place, paint the designs and then remove the paper which acts as a natural mask. It would have been long to paint them by brush, so I broke out the airbrush for the white coat.
Here you can see the finished templates on the left after removing the protective layers and the airbrushed templates on the right.
I was curious to see how they would match up with my store championship range ruler so I made a quick side by side comparison:

Color is almost exactly the same, a bit more yellow for Cog'O'Two, but probably invisible in action. Technology is different though, FFG etching technique is smoother somehow, leaving a pattern of very small dots, while Cog'O'Two leaves a pattern of very small lines a bit more visible.
It's minute though and I'm really happy with the templates.

Time to reload,
Ica


Friday, March 21, 2014

Step by step : Dagger squadron B-Wing

As promised, a step by step with pictures of the B-Wing repaint.

Preparation:
First came the stripping in brake fluid, then the magnets and the base mod. 2 broken guns were repaired with a paper clip. (products used: brass rod, araldite glue, 3*2mm rare earth magnets)


Next came the black undercoat (citadel chaos black) and the white base coat (pro-color white). The white was applied with an airbrush aiming from above and left of the model to create natural shadows and color modulation as if the light source was above and left. The dark side of the model also received the white base, but much less, giving a greyer aspect.


Brush time! Red is citadel mephiston red, applied in thin layers to keep the grey modulation underneath. Black is citadel chaos black. Inspiration came from this:  http://www.toymania.com/news/messages/10551.shtml


Protect the model with gloss varnish (in my case vallejo model air).
Now the scary part! Put some black oil paint on a paper towel to absorb most of the oil. Then mix the paint with lighter fluid (essence F in french). Apply the wash generously on the model:


Wait for the wash to dry (a few minutes in my case).
Reward time! Take a Q-tip humid with white gas and remove the excess wash, leaving the wash in the panel lines. The beauty of it is that you can vary how much wash you remove by controling the amout of pressure and the humidity of the Q-Tip. Take your time the wash won't stain the paint underneath.


Revarnish with mat varnish (PA air with an airbrush).

Brush time 2! Highlight panels and go back over any mistakes in the previous steps. I also lightly glazed the red parts with blood red to give them more impact.


Final step engine glow! First the engines were sprayed with white to determine the area of the model that would received the glow.


Then they received a coat of fushia pink (airbrush) and the inside were painted white.


However after showing the model on http://community.fantasyflightgames.com/index.php?/topic/101573-b-wing-repaint-dagger-squadron/ I received a few comments that the engines glow was not good enough. So I went back with a brush and redid them using Prince August fluo yellow and orange + white.


I HAVE YOU NOW!


Time to reload,
Ica

Monday, March 17, 2014

Showcase : Dagger squadron B-Wing

After messing around with the Tie fighter, I decided to tackle a slightly bigger project : a B-Wing.
The paintjob is inspired by Dark Horse Rebellion Dagger squadron, the first rebel squadron to fly the B-Wing.


To make things more interesting, I decided to magnetise the stand and the cockpit as the fighter is supposed to be able to rotate around the pilot.


Engines received a coat of fushia to represent the reactors glow.


I had to replace two of the canons, broken while stripping, with paperclip rods. Can you guess which?


The base was painted as well, to give a bit of spice to a rather bland piece of plastic.


Dagger leader! There's a Tie on my tail! I can't shake him!


Next article should be a step by step of the B-Wing paintjob.

Time to reload!
Ica

Sunday, March 9, 2014

Blog hiatus over: X-Wing miniatures Tie Fighter repaint!

Long time no see! After a pretty big hiatus in my blogging I have decided to restart the blog with this Tie fighter repaint:


The game is great and the miniatures are really detailed, a real pleasure to paint.

The model was first  stripped to bare plastic with break fluid, then undercoated with black primer.


Base color is airbrushed  space wolve grey with a zenithal white highlight.
All grey parts where then washed with ivory black (oil paint) diluted with white gas after after a coat of gloss varnish.


After the wash dried I then used a cotton qtip dipped in white gas to remove the excess then resealed the model with matt varnish. All solar panels where then covered in chaos black.

Finally I highlighted the edges with a mix of space wolve grey/white and painted small dots for the laser cannons and the ion engines.


Hope you like it!
Next up on the painting desk should be either a B-Wing or an X-Wing.

Time to reload,
Ica